How to Setup a Shared Mailbox in Exchange Online (O365)?
“Find Steps to ensure how to create shared mailbox in Office 365 using Exchange Admin Portal or Windows PowerShell. Check how many shared mailbox can be created in office 365.”
Shared Mailboxes in Office 365 (Exchange Online) is the best feature provided by Microsoft which allows a group of users to access and send e-mails from a common mailbox. You can set up a shared mailbox in Office 365 and use it for many purposes such as Sales, Info, or Billing. You just need to assign Send As permissions to the users so that they can reply to messages or send new emails using that address. The shared mailbox will be added to assigned user’s profile automatically. The best thing about shared mailbox is that these mailboxes do not require any license, so you will never need to pay dollars for them.
Note: There are two options to create a shared mailbox in Office 365 one is by using Office 365 console and another is by using Windows PowerShell. If you need to set a lower mailbox quota then I will suggest you use Window PowerShell for adding a shared mailbox in Office 365.
How to Create a Shared Mailbox in Office 365 by using Office 365 Console?
This is the easiest way for setting up a shared mailbox in office 365. You just need to follow a few simple steps to create a shared mailbox in Office 365 as listed below.
-
-
-
- In the very first step, Login to Office 365 Exchange Admin Portal.
- Now Click on “recipients” under dashboard > Click on “Shared” > Now click on “+” icon to create a new shared mailbox.

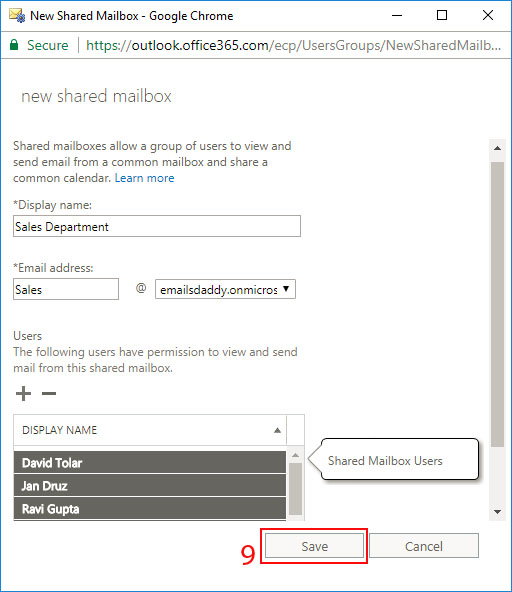
- Provide Display Name (Mailbox name), Email address and assign users who can use this shared mailbox for sending or receiving emails.

- Finally, Click on OK All done!!!
Now you can access this shared mailbox in MS Outlook and Office 365 Portal (OWA) as per your requirements.
How do I Create a Shared Mailbox in Office 365 via PowerShell?
If you are comfortable with Windows PowerShell commands then this method will help you to understand how to set up a shared mailbox in exchange online using PowerShell.
Step-1: In the very first step, log into Office 365 using PowerShell commands.
$LiveCred = Get-Credential$Session = New-PSSession -ConfigurationName Microsoft.Exchange -ConnectionUri https://ps.outlook.com/powershell/ -Credential $LiveCred -Authentication Basic –AllowRedirectionImport-PSSession $SessionStep-2: Create a Shared Mailbox using following commands:
New-Mailbox -Name <Shared Mailbox Name> -SharedStep-3: Set a lower quota using the following command:
Set-Mailbox < Shared Mailbox> -ProhibitSendReceiveQuota 5GB -ProhibitSendQuota 4.75GB -IssueWarningQuota 4.5GBStep-4: Assign permissions to a user or group of users for the shared mailbox
Assign FULL ACCESS permissions for Shared Mailbox
Add-MailboxPermission <Shared Mailbox> -User <Mail Recipient> -AccessRights FullAccess -InheritanceType allAssign Send As permissions for Shared Mailbox
Add-RecipientPermission <Shared Mailbox> -Trustee <Mail Recipient> -AccessRights SendAs -confirm:$FalseNote: Never forget to end the session before closing the PowerShell window because you will be the login for next 15 minutes even after closing the window. Use the following command to end the session.
Remove-PSSession $SessionHow many shared mailbox can be created in office 365?
A shared mailbox is free and doesn’t require a license. Still, there is a size limitation of using Shared Mailbox. A Shared Mailbox cannot grow larger than 5GB. So if you want to stay within the free license you need to set Quota for each shared mailbox by using PowerShell command described above.
Conclusion:
In this article, I have discussed how to create a shared mailbox in Office 365 using Office 365 console and PowerShell. I hope this article will help you many Office 365 users in adding a shared mailbox in office 365. Still, if you have any doubts or suggestion related to the blog then feel free to put a comment. I will be happy to help you. You may also post your feedbacks.
-
-